Craft Your Own Stunning Thanksgiving Centerpieces! 🍂✨ Dive into this Easy DIY Project to Elevate Your Thanksgiving Dinner Tables-cape. Follow our Step-by-Step Guide for Effortless Elegance!”
Materials Needed:
- Artificial flowers and greenery of your choice
- A medium-sized pumpkin
- Hot glue gun and glue sticks
- Scissors or wire cutters
- Optional: Ribbon or twine for additional embellishment
Step-by-Step Instructions:
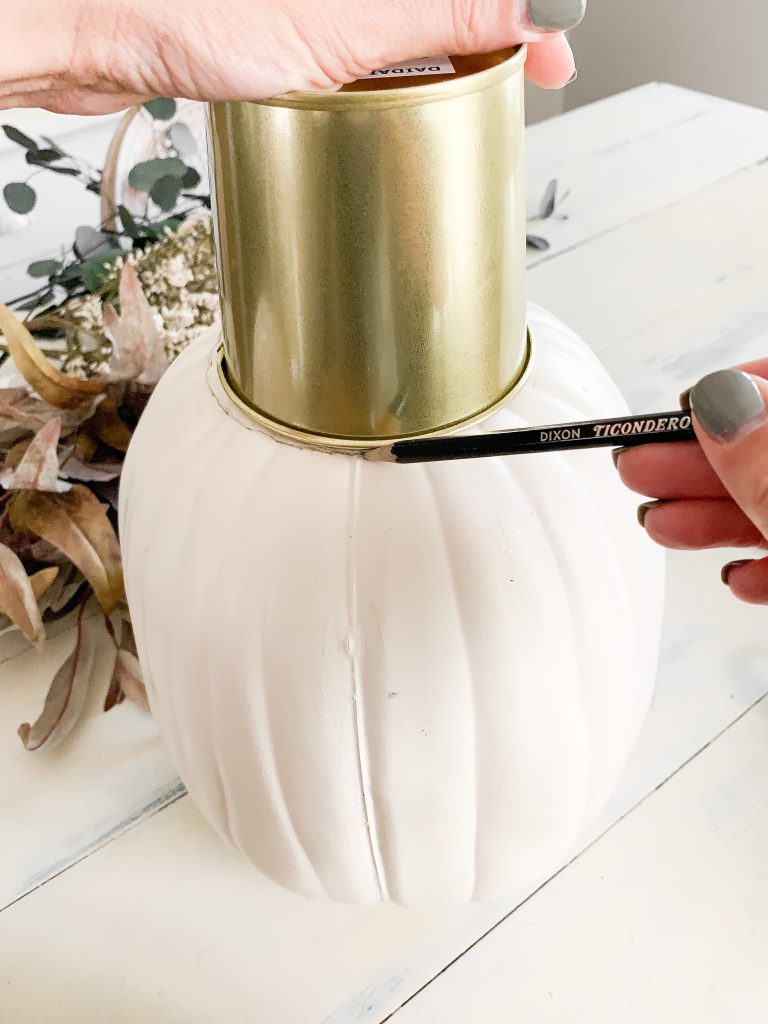
Draw a circle
Use a pencil or the end of a paintbrush to create holes in the pumpkin where you want to place the flowers. Make sure the holes are wide and deep enough to hold the stems securely.

Prepare the Pumpkin:
Clean the pumpkin’s surface to remove any dirt or debris. If you want, you can also paint or decorate the pumpkin beforehand to match your desired theme.
Place the Jar in the pumpkin
Arrange the Flowers:
Begin by inserting the stems of the larger flowers into the holes you created. These will serve as the focal points of your arrangement. Position them evenly around the pumpkin.
Add Greenery and Fillers:
Insert pieces of greenery and filler flowers between the larger blooms to create a balanced and full arrangement. This will add depth and texture to your centerpiece.
Secure with Hot Glue (Optional):
If needed, apply a small amount of hot glue to the base of each stem before inserting it into the pumpkin. This will provide extra stability.
Adjust and Fluff:
Take a step back and assess your arrangement. Adjust the flowers and greenery as needed to achieve the desired look. Fluff and position them until you’re satisfied with
Optional Embellishments:
If you’d like, you can add ribbon or twine around the base of the pumpkin for an extra decorative touch.
Display Your Pumpkin Centerpiece:
Place your decorated pumpkin on a decorative tray or directly on your table. It can serve as a stunning centerpiece for gatherings or as a festive decoration for any occasion.
Tips for Balancing Colors:
-
- Arrange the Flowers:
- Begin by inserting the stems of the larger flowers into the holes you created. These will serve as the focal points of your arrangement. Position them evenly around the pumpkin.
- Add Greenery and Fillers:
- Insert pieces of greenery and filler flowers between the larger blooms to create a balanced and full arrangement. This will add depth and texture to your centerpiece.
- Secure with Hot Glue (Optional):
- If needed, apply a small amount of hot glue to the base of each stem before inserting it into the pumpkin. This will provide extra stability.
- Adjust and Fluff:
- Take a step back and assess your arrangement. Adjust the flowers and greenery as needed to achieve the desired look. Fluff and position them until you’re satisfied
Remember, personal preference plays a significant role in choosing colors, so trust your instincts and go with what feels right for you. Ultimately, the goal is to create an arrangement that brings you joy and complements your space.
Here are some delightful examples to inspire your own pumpkin flower arrangement. These charming displays showcase the beauty of combining pumpkins and faux blooms, offering a range of creative ideas for your own unique centerpiece. Take a look and let your creativity flourish
